Hoverboard main board with simpleFOC

I’m using Simple FOC for robotics. Yes you can synchronize many motors for use on diferential drive wheels, arms and legs. Just as if you had brushed DC gear motors, you need encoders on the motors and a PID loop to control velocity of the wheels or position of the joint.

A robot with wheels where each is powerd by a diffent motor will NEVER drive straight even with PID velocity control on each wheel. The friction under each wheel is differnent, or a some other tiny thing turns the robot. Maybe the winding of the moters are not the same and one has 1 pole with lower inductace. The physical world is not perfect.

The solution is to have the master computer meare the robot’s heading with a sensor like an IMU or even a simple gyro. The master computer runs a “heading PID” and commands the velocity set points in the left and right motor to keep the heading constant. (or to keep it not constant if the plan is to roll along an arc or a conic section.

A simple industrial solutio is to paint a line on the floor and the robot uses optical sensors to folow the line. IMU chips cost under $10.

Then you find the gyro drifts at some number of radians per seconds and you need a clever scheem to compensate. We typically use multiple heading and odomerty sensors, optical-flow and IMU and GPS and wheel sensors and put it all in a Kalman filter. Lucky for us ROS has funtions to do everything I described above, do not re-inven it.

In short, expect the wheels to slip and not grip the floor as theory would predict. Sense the error and corect it by adjusting the velocity set point of each wheel

Same for my walking robot, you need sensors and multiple levels of control loops. Thevelocity PID in Simple FOC is only the innermost loop
Dear Mr. ChrisA
Really many thanks for your a lot of information and sharing this experiences.
I spent much time just to run motors to create indoor robot.
by the way I use BLDC motors from (old hoverboard),
Proposed robot for :-

  • Indoor application (so, no GPS can use).
  • Very low speed traveling/positioning.
  • First version will be remotely controlled (i.e. I’ll control robot by mobile via video app, and so robot has camera to let me see what he see, and then I control it by arrows).

So, kindly, can you guide me to find PID controller that at least control the two motors drivers go like what I need (specially at straight-forward for two motors).
I modified the original driver of hoverboard to work as (PWM (speed), Direction) per each motor.

so, my requirement now is PID-Controller make balance movement in straight-forward for these two motors.
I have AXDL345 gyro, Arduino, Hall encoder from each wheel, and serial Bluetooth for commands (simple arrows).
Kindly, help me to find that,
thanks in advance.

Hi,

I am one of the contributors to that firmware.
I am spending a lot of time at the moment understanding/improving the current sensing for dual motors
Let me know if you have any questions.
Maybe we can collaborate.

1 Like
1 Like

Hi,

I started experimenting with the arduino-GD32 platform in this new project.
The sideboards have no motor control but it helps me validate that USART/I2C/GPIOs are handled properly.

I imagine that if we want to later extend this to splitboards using simpleFOC, we would need to write such driver with GD32 SPL ?

I discussed it with one of the active Splitboard project and there is some interest. We could borrow some of the SPL code from there.

Please any advice is welcome.

I’m not sure what SPL is, but yeah, it would need a GD32-specific PWM driver and ADC driver for current sensing…

I’d be interested to see any progress you make on this!

It’s the GD32 hal.
As we would be aiming for specific boards, is it OK if we develop only 6pwm and then only low side current sensing?

Well, there are two parts to this answer:

  1. of course it is ok, and I would be happy to help if I can

  2. BUT: we would probably leave the support for GD32 on a branch if it only supported 6-PWM and low-side sensing. This is because I think it would cause a lot of confusion and support effort if we merged it to the main branch in this state. The SimpleFOC hardware (SimpleFOC shield, SimpleFOC mini) is 3-PWM, and the shield uses inline sensing, so lots of users would ask about this.

But I also think that if you made it work for 6-PWM low side sensing, it is actually the hardest case, and we could probably manage to make the other cases work quite quickly based on that…

1 Like

Thanks for offering your help.
I totally understand not having complete support for GD32 would be misleading.
Actually we would be implementing only 6PWM and low side, but only for some GD32 chips (GD32F130C6T6, GD32F130C8T6), but we have to start somewhere.

I forked ArduinoFOC and will start to investigate 6PWM.

First step, replace all ‘stm32’ by ‘gd32’ :rofl:

1 Like

Its probably a good idea not to copy the STM32 code - a lot of that code is about optimising the pin assignments to the timers based on the framework PinMap structures.

Some of the other PWM drivers are much “cleaner” e.g. the RP2040 one.

For a new MCU I’d almost start with an “empty” file containing just the stubs that need to be implemented like _configure6PWM() and _setDutyCycle6PWM().

Thanks for the hint :pray:

Hey no problem - if you’re on discord I’m also happy to jump on a chat if you want to discuss anything. We’re very appreciative if anyone wants to undertake such a difficult task, so happy to support!

The basic operating principle of the PWM drivers is that the _configureXY methods return a void* to a hardware-specific struct. You can put in in whatever you like and need for the GD32, but typically it contains references to the timers and channels used, etc…

the _configureXY methods are supposed to make sure the pins used make sense, make sure the timers/pins aren’t being used more than once, etc… Then they initialise the timers, sometimes this also involves setting up the clocks that drive the timers.

Finally they create and fill the driver-specific struct and return a pointer to it.

If at any point they fail, they should clean up as best they can, and return the error constant. They can make use of SimpleFOCDebug::println() to inform the user what when wrong.

the _setDutyCycleXY methods are called to change the duty cycle or set the phases to hi Z mode. They should be implemented as efficiently as possible and should never print to serial port or things like this.

In terms of PWM, the object is provide the most control over the frequency as the hardware allows, ideally from 1Hz to 200kHz :slight_smile: if the hardware can’t do it, we take whatever the hardware can do. The SimpleDC library can use low PWM frequencies, the SimpleFOC library uses 2kHz - 100kHz realistically for BLDC driving, with 22 - 40kHz being the most used ranges.
For a given PWM frequency, the hardware should be configured to give the highest resolution it can, e.g. generally this means setting the clocks as fast as they can go.

PWM should be configured in “phase correct” or “centre-aligned” mode. Sometimes this is also called “up-down counting” mode. In this mode the timers count up to the top, and down again, switching on as they pass the compare value upwards and off as they pass it downwards. This leads to PWM signals that have the on-time “centred” in their periods, and this is important for low-side current sensing.

In terms of 6-PWM there is extra complexity: dead-time insertion.
Some MCUs can do it in hardware, some can do it, but only for very specific pins (e.g. STM32) and others can’t do it at all. If GD32 offers it, it would be good to support it.
Where not supported due to hardware or bad pin choices, the 6-PWM driver should support software dead-time insertion. This can only work if the PWM is centre aligned and all pins are driven by timers that are synchronised (same PWM frequency and started concurrently).

Furthermore the 6-PWM driver should support setting Hi-Z mode by checking the phase state and setting the FETs accordingly.

Really, if there are any questions, please let me know. You can also feel free to DM me.

This is a very very very initial commit just to make sure I go in the right direction.

@robca we can collaborate on this offline if you are interested

Definately looks like the right direction given you’re targeting only 6-PWM for the moment.

Does it have to be TIMER0 or could one configure 6-PWM on other timers as well?

Yes timer0 is the advanced timer that has complementary channels and deadtime insertion. But I can look at software 6pwm and other pwms later.

We would need to improve arduino-gd32 for that as well

It works but I need to do more tests.

3 Likes

Hi,

The development was in standby as I was in holidays for 2 weeks.
The driver seems to work fine, but as I am new with simpleFOC, there are things I don’t understand.
If I set driver.voltage_power_supply, driver.voltage_limit and moto.voltage_limit to 16V, I was assuming that in pure voltage mode, I could set a target of 16V. But it seems anything above 8V is just clipped because it’s added to center here?

[EDIT] Nevermind, I missed this

Ok, so its all clear?

You really want

motor.voltage_limit = driver.voltage_limit / 2.0f;

This is because they act in different coordinate spaces - the motor limit acts on the D/Q axis vector while the driver limit is an absolute limit referenced to GND.

I find it a bit confusing but now It’s clear why higher target was resulting in more noise and lower speed :stuck_out_tongue_winking_eye:

Thank you, I will also include this parameter.

When I will work on the current sensing, I should then reduce driver.voltage_limit to allow a minimum of low side ON time for the sampling of 2 currents with a single adc.
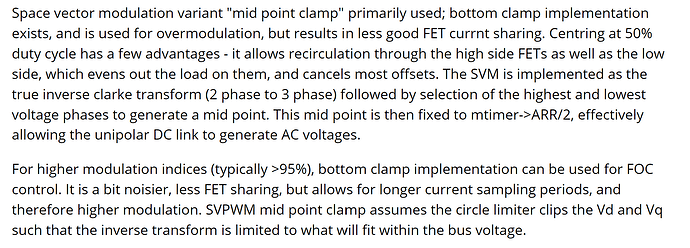
One thing I saw is that simpleFOC is using driver.voltage_limit/2 for centering the modulation, which is not 50% if driver.voltage_power_supply > driver.voltage_limit.
I think it’s good practice to center at 50% to balance the low side and high side.
Have you guys ever thought about it ?

Sorry if I ask too many questions :sweat_smile:

[EDIT] One of the places where I saw a mention about that

And this from here: