STM32 pinouts docs - should we put more effort in it

Hey @Robert_Semenoff!

Just a quick question out of curiosity. In our docs we have the stm32 pinous lookup tables in: STM32 Family Pinout | STM32 Pinouts

Do you think it’s worth spending some more time on them to make them more user friendly (like to show pins associated with the same timer or the same ADC) of the ability to search for available 6pwm timers and so on?

Or did you find stm32cubemx to easy to install and use to make these things actually useful?

Here is a quick poll on the usefulness of stm32pinouts docs - should we put more effort into it?

  • It’s good as it is
  • It’s useful, but should be easier to navigate
  • Not useful, we can find the data elsewhere
0 voters

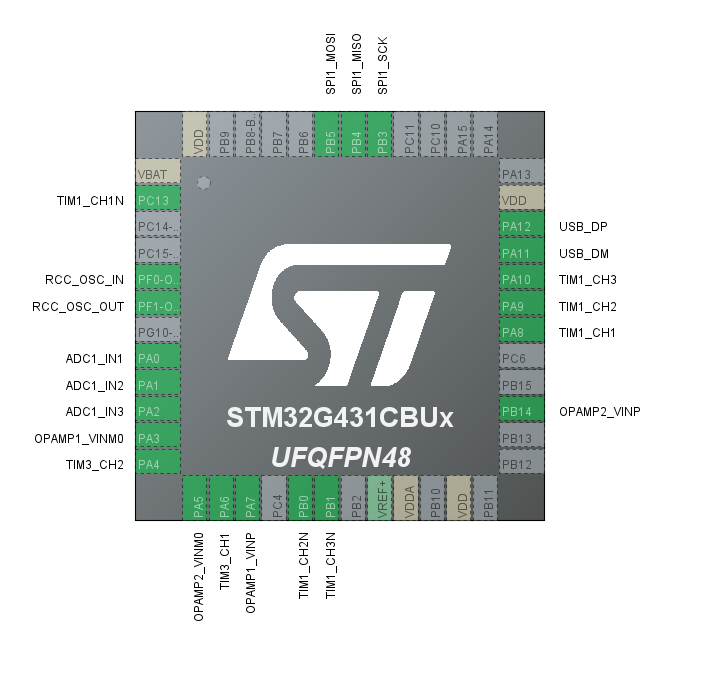
Personally I find a more graphical depiction is quickest to read. In this case you can google “blackpill pinout” to get good images.

But you will also want to fit other functions as well. You have the encoder feedback, and you might want a oled display, some actuators, etc. I also like having a gold-standard authoritative reference (even though cubeide is a nightmare for building full projects). I use the AI chat tools a lot, I could see ST adopting their own AI chat specifically trained on every detail of each microcontroller (because chatgpt and even deepseek have big knowledge gap there) …

To be honest, CubeMX is more than enough tool (and is managed/maintained by the vendor) that I don’t see any real reason to reinvent things- there are so so so many chips too. Plus doesn’t have all the bloat of CubeIDE like @Robert_Semenoff says :smiley:

That’s awesome to hear.

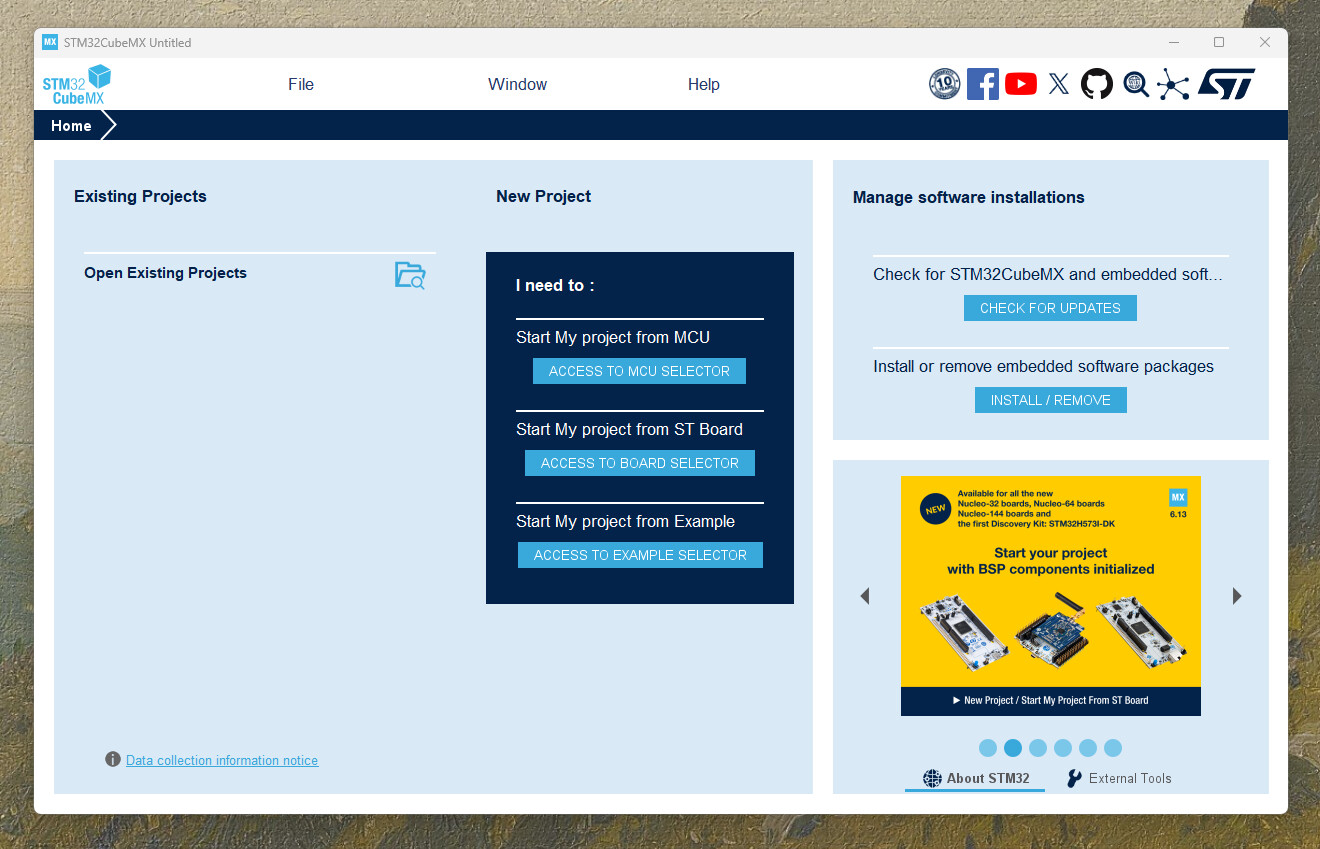
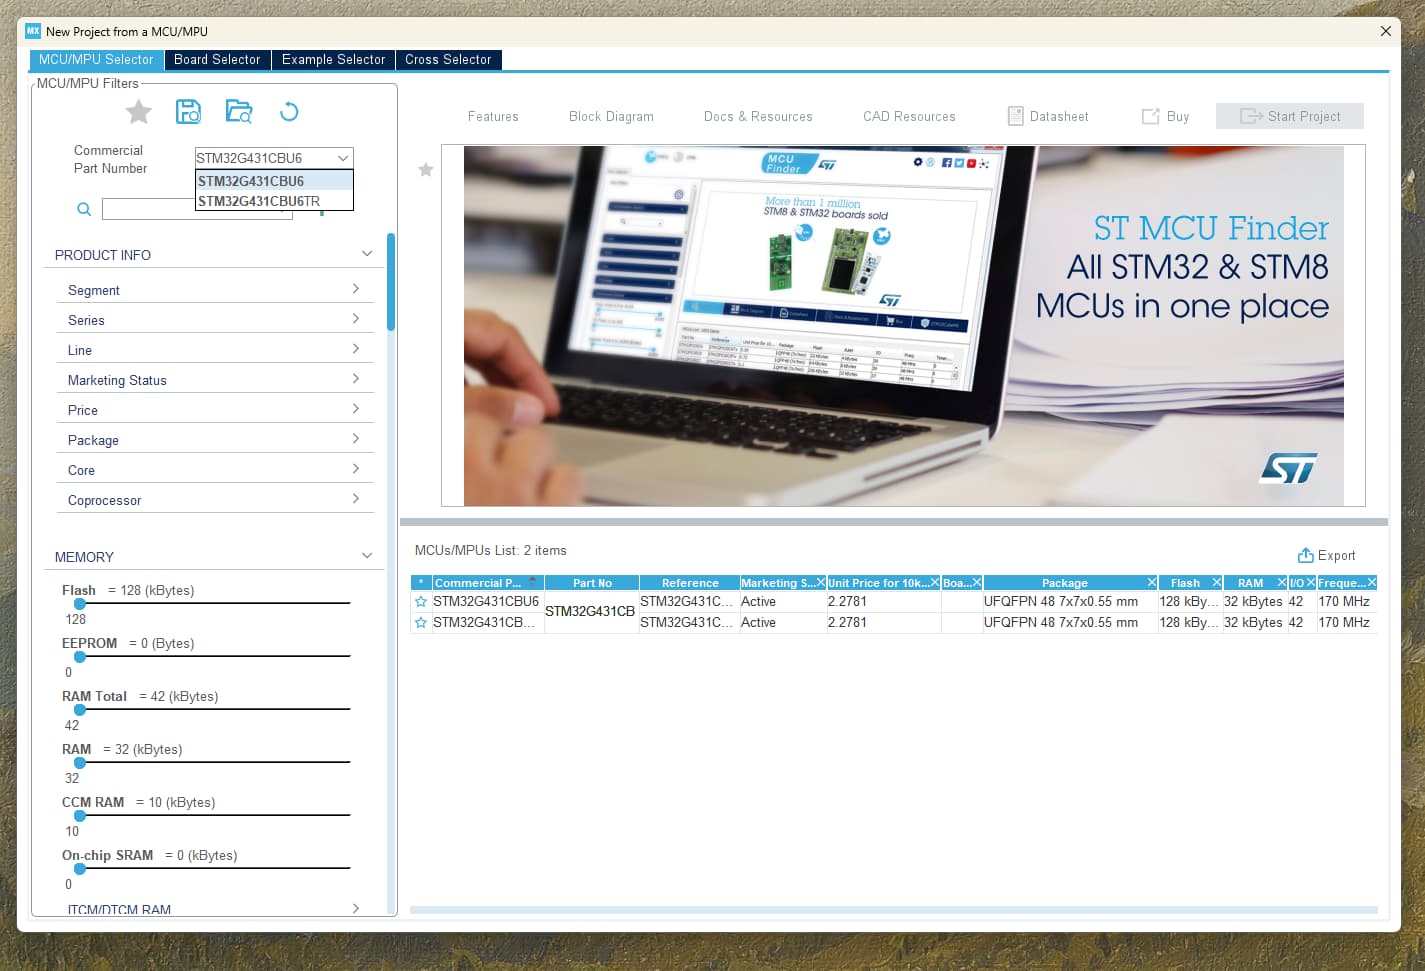
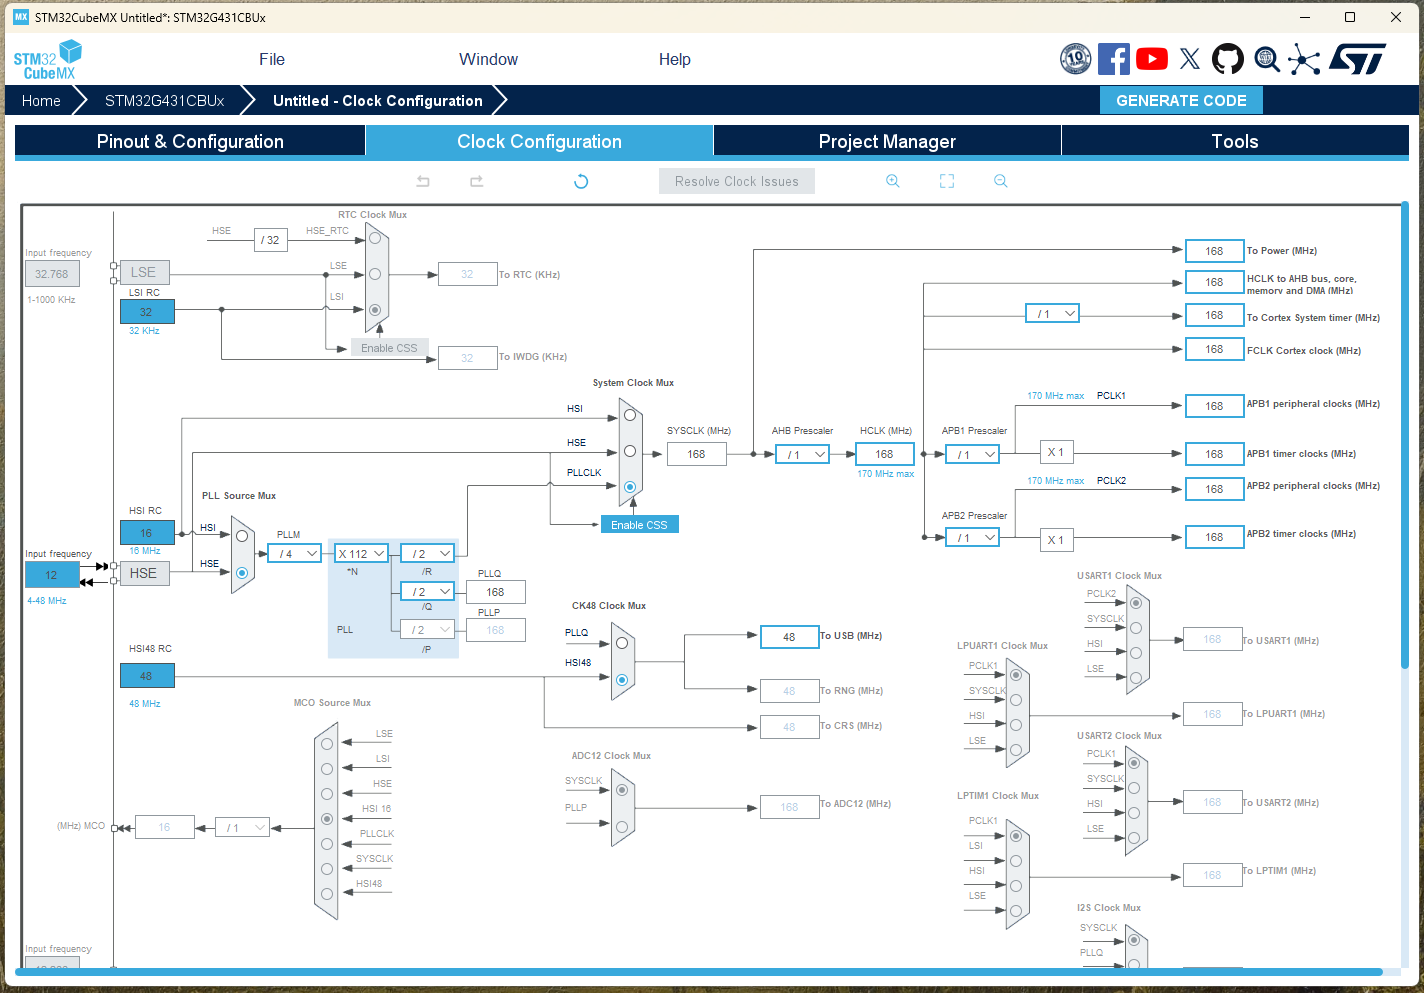
Would you guys be in to make a short tutorial on how do you use cubemx with simplefoc?
I’d be in to help you integrate it within the docs. Maybe within the practical guides section :smiley:

To help people who would maybe lose their time on searching on these lookup tables :slight_smile:

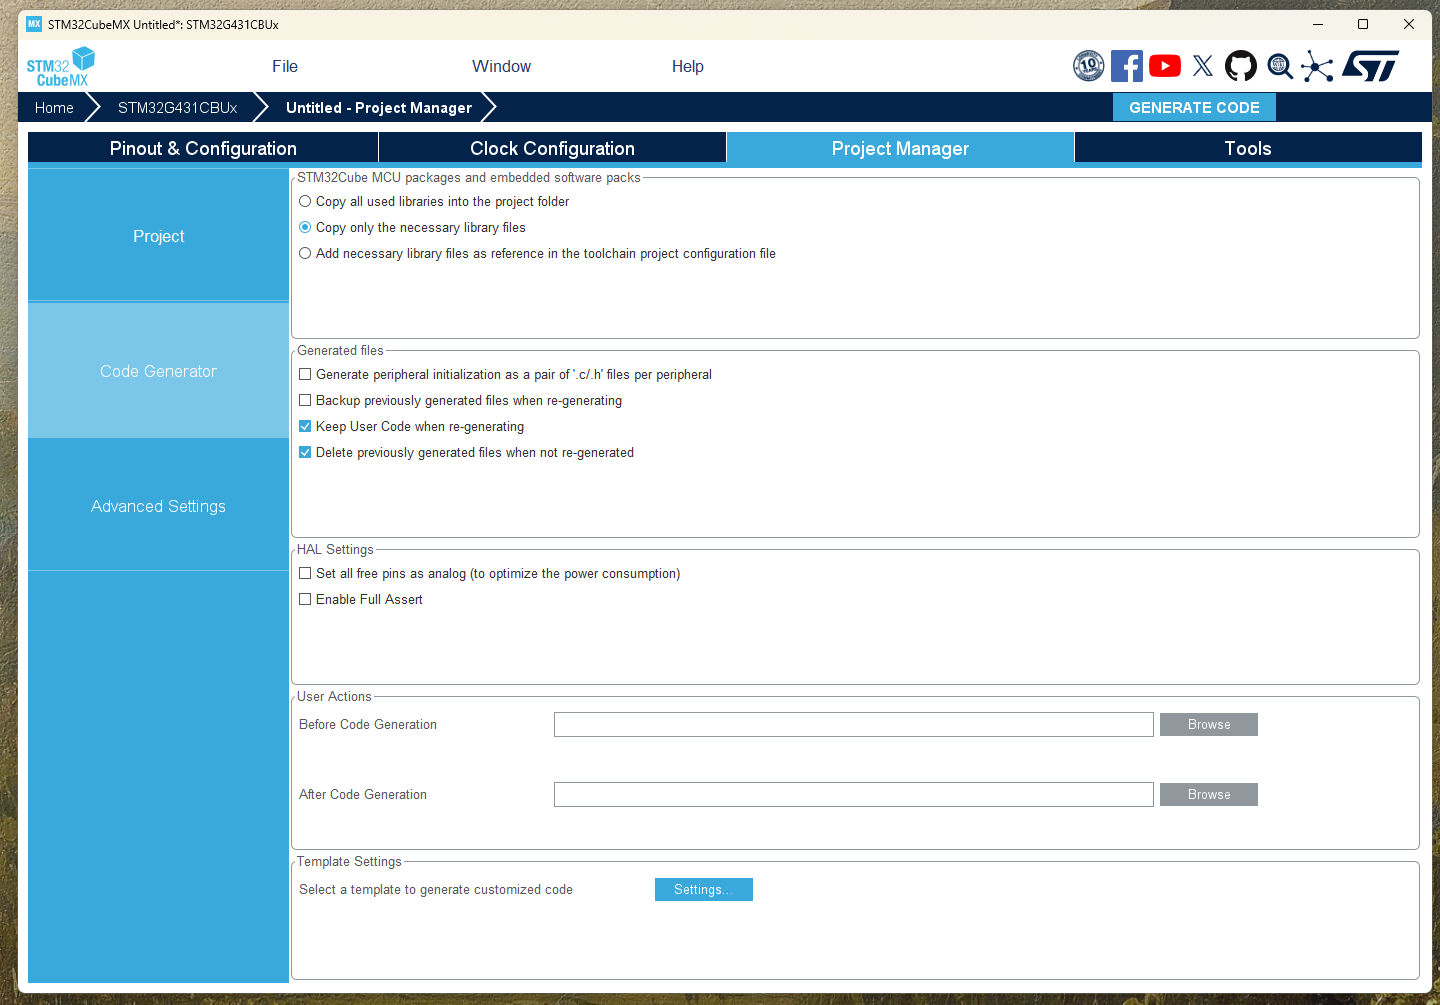
sure, are screenshots enough or do you want something like a screen recording? I can send to you on Discord

Yeah screenshots would be awesome!
Actually even more awesome would be if you could just put it here in the post so that people can find it easily, if someone is searching in the forum.
But any way really works!

1 Like
  • get software from here: https://www.st.com/en/development-tools/stm32cubemx.html#get-software

    • they want you to make an account, seems really unecessary, you can just give them a burner email from something like https://temp-mail.org/en/
  • Choose access to MCU selector:

  • find your chip, I’ll do G431 for example

  • pick your peripherals

    • For motor control, use a timer (PWM generation CH1/2/3 for 3PWM or PWM generation CH1/2/3 CH1/2/3N for 6PWM). Note: not all timers have 6PWM outputs and also a few do not have 3PWM outputs either.
    • For quadrature encoder, use a timer and set Combined Channels to Encoder mode with/ without index (index not currently supported in simpleFOC)
    • For digital interfaces, choose an instance of peripheral in the Connectivity dropdown and enable it. (USB, CAN, SPI, I2C, etc)
    • For ADC (current sensing, Vmotor sense, etc) go to the Analog dropdown and enable channels. Set them to single ended unless you have reason to use differential. If you want to do simultaneous sampling, you need to use the same channel on two different ADC instances (e.g. ADC1 CH1 & ADC2 CH1). Channels on a single instance of the ADC are sampled sequentially (e.g. ADC1 CH1, CH2, CH3).
    • If you want to use on-chip op-amp like on B-G431B-ESC1, also enable this in analog section.
    • You can add various GPIO (user button, LEDs, etc) just by clicking the pin and set to GPIO_Input/Output etc.
      You will end up with something like this:

      You can rename the pins by right clicking on them and setting them to something thatt makes sense for your project (ENCODERA/B, UH/VH/WH etc)
  • If you don’t like the pins that it picked, you can view the alternate pin locations by hovering over the pin with an assigned function and hold down Ctrl + left click.

  • If you are using a custom clock configuration (HSE for low jitter, etc) you can enable that in System Core under RCC section (HSE crystal/ceramic resonator). Then you should go to the Clock Configuration tab at the top and adjust the prescalers so that the peripherals are clocked at appropriate speed. For example:

  • If you did not use a custom clock configuration or you are not using any special peripherals without Arduino support (CAN and OPAMP) then you can just be done here, just take a screenshot or save the project so you know what pins should go with what peripheral when you start layout on your PCB or writing firmware. If you are using either or both of those (custom clock and special peripherals) then you need to export some boilerplate snippets to configure them in your project.

    • Go to Project Manager section, change Toolchain to STM32Cube (just because we don’t need to generate the HAL files, they are handled already for us by STM32duino and/or platformio).
    • Go to Code Generator section on left and set radio button for “Copy only the necessary library files”. Under generated files also check “Generate peripheral intialization as a pair of ‘.c/.h’ files per peripheral”.
    • Hit “Generate Code” in the top left. It will make all the files needed to initialize the peripherals with the settings you chose from the configuration window. Then you can copy the .c/.h for the specific things you need over to your new project (for example, you only need to copy over the CAN related files, you don’t need to also worry about GPIO, main.c, etc that it will generate). For example :
    • For custom clock configuration, the clock initialization code is located in main.c. You need to open it and copy / paste the System_ClockConfig function from there into your main project. It is weakly bound by the framework so you do not need to do anything other than just copy in the function over to your files.
  • If you are working in C++ don’t forget to wrap the functions in an extern “C” (this is handled for you in any generated headers but is easy to miss).

  • If it asks you to log in to download the firmware packs for the microcontroller, this is not necessary, that’s just downloading the HAL library for the chip. You can skip this as the STM32duino framework already handles this for you.

2 Likes

Awesome!
Thanks, I’ll try to integrate it to the docs for the next release. :smiley: