This post will show step by step ordering of the Mosquito board v2.0.
Prerequisites: JLCPCB account. Please go to
and create a new account if you do not have one.
Let’s begin.
Create a GERBER file.
Click on the link above. This will take you to the following page:
On that page, click on the following button:
The schematics project will open in EasyEDA editor. The screen will look more or less like that:
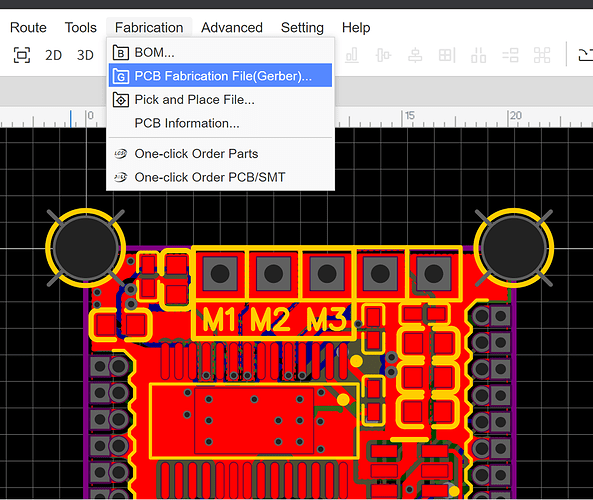
On that screen, open the Fabrication drop down and select PCB Fabrication.
Click on Generate Gerber
The following screen will open.
Click on Generate Gerber. Yes, I know, the JLC order system is not exactly what you call streamlined. Just close your eyes and go with the flow. Now open your eyes. Save the ZIP file locally in a directory. The file will be called Gerber_PCB.zip
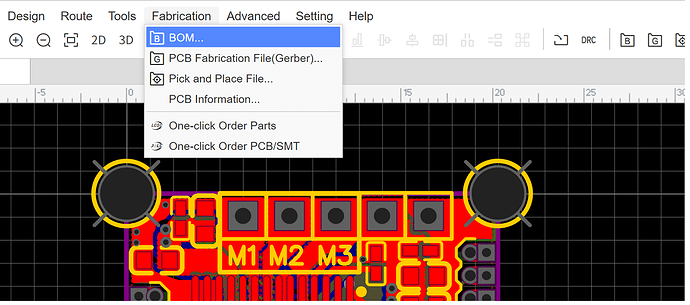
Next, go back to the PCB viewer and select BOM.
The following screen will show up. Click on Export BOM.
Another screen will open. Click Export. Save the file.
The file name will be something like BOM_PCB_2022-06-05.csv
Next, Click on Cancel. When you export the BOM, the BOM order screen will not close, so you need to Cancel it. It’s a bit confusing but c’est la vie. Go back to the main menu. Under Fabrication, select Pick and Place.
The following window will appear. Click on Export.
Save the file, the name will be something like PickAndPlace_PCB_2022-06-05.csv
At that point you have the Gerber, BOM and Pick and Place file (also called a PnP, or centroid file).
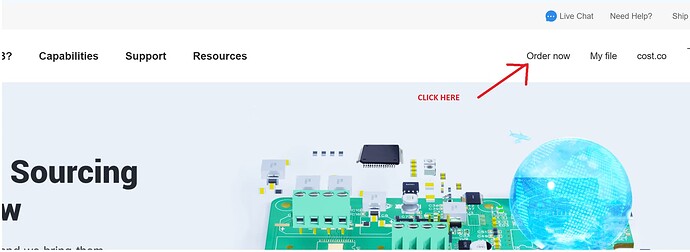
You are ready to order. Log into your JLC account. Click on Order now.
Click on Add gerber file and import the Gerber ZIP file you created above.
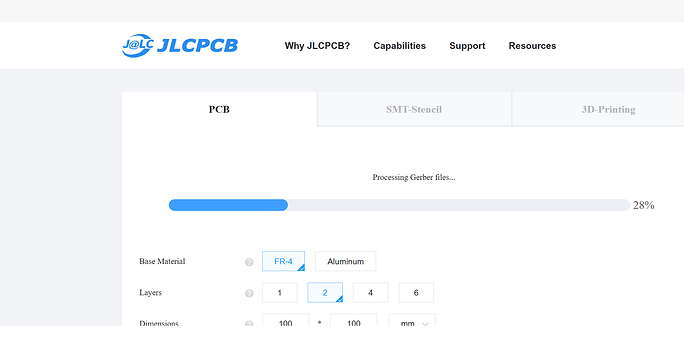
You will see a progress line indicator, which sometimes if JLC web site is very busy may not complete to 100%. No worry, just keep going. It’s helpful, however, to wait to 100%.
At the end, if import is good, you will see your board. This is how your order will look like.
Now you need to select how many Mosquito boards you want. The minimum is 5 PCB boards (with 2 boards SMD), the maximum is your imagination. Let’s go for 10 PCB boards and 10 SMD.
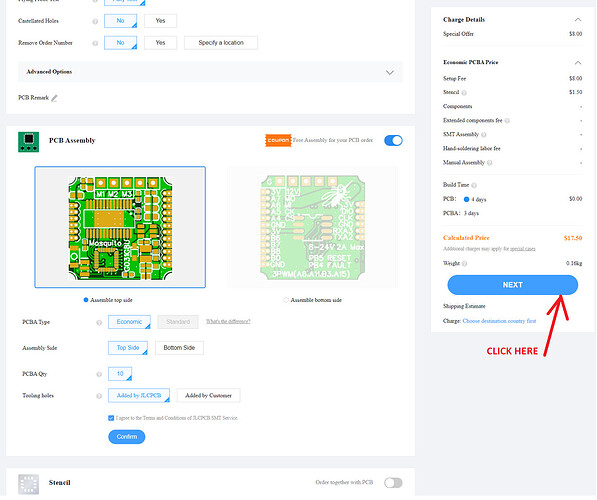
Leave the rest of the options as is, do not touch it, and scroll all the way down, we need to select PCB assembly. Click on the PCB Assembly toggle button.
Your screen will change to this. Click on NEXT.
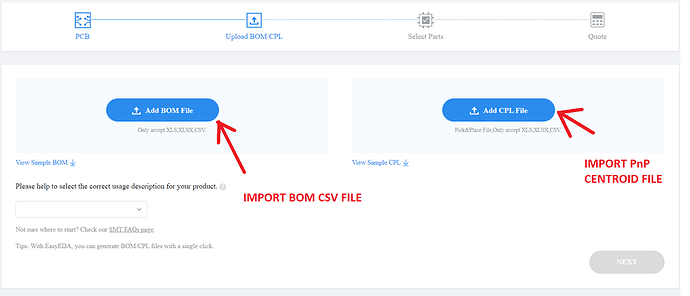
The following screen will appear.
On that screen, import the two CSV files you created above. Once you import them, the screen will change to this.
Select Research option, click on DIY, then click on NEXT. This will be the hardest part of the order, due to silicon shortages, you will have to replace some components with synonyms.
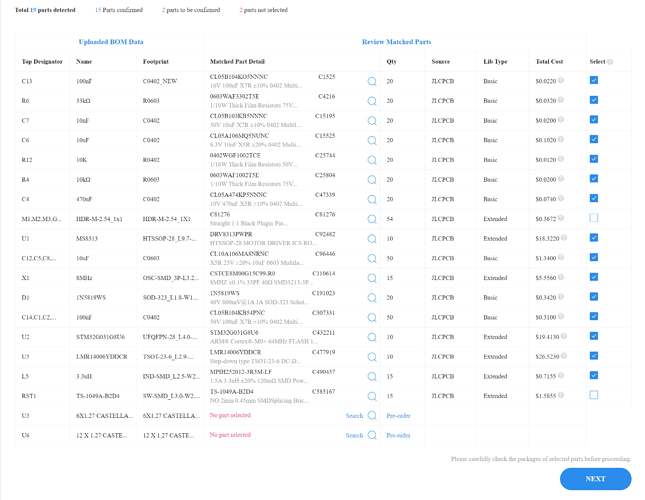
The screen will change to this.
As you can see, the cheap driver is out of stock. Also, the resonator is out of stock, too. Let’s select synonyms. This I cannot describe and provide a recipe, as it requires pretty involved knowledge of the components. I can only show you the logistics.
MS8313 is missing. There is only one option for the driver, TI’s DRV8313. Select the magnifying glass option to search for optional components.
Type DRV8313 in the text field, then click on Search.
See if there is a component in stock, and select it.
The screen will change to this.
Next, let’s search for a resonator. This resonator is VERY special, it is ultra-small footprint with integrated capacitors. We may not be too lucky. You must know exactly what to look for, else you will end up scrolling through hundreds of pages of thousands of 8MHz resonators.
Lucky you, because you have spent the last 30+ years in the industry and can rattle out the resonator you need by component part number and manufacturer, right? Right? No? Oh, come on, where is your sense of adventure! You reach deep into your real-time neural network database (brain) and type in the following part number from memory:
CSTCE8M00G15C99-R0
and… voila… the component is in stock! Hey, who said miracles don’t happen, eh?
Click on Select and Bob’s your Uncle, as Down Under says.
Now, that’s a BOM list we like, very, very much.
Next, optional step, we remove from the BOM list all manual soldering parts to make the process and the board a little cheaper. You may skip that part if you don’t want to solder, but I like to burn my fingers for a few $$ so let’s do it. We de-select all pin headers. I will also de-select the tactile MCU reset switch, I don’t need it really, but you may, so choose wisely, as Indiana Jones say.
This is the final BOM order page. Click on NEXT.
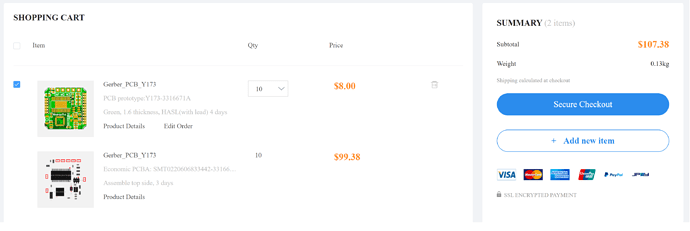
At last, we have arrived at the order page. Here you have one last look before you save your order to the shopping cart. Do not worry, you are not paying anything yet, and can cancel the order at any time later and delete it. Review very carefully, once you place into the cart, you need to repeat everything from the very beginning if you need a change. An order in the shopping card cannot be edited.
Finally, we have arrived at the Pièce de Résistance, as French gastronomes say when they see their order of Beef Bourguignon with Truffle mash beings cooked, then stroke their bellies and pull out the Gauloises. Would you like one? No? C’est domage…
From here, the order is in your hands, or as Ostap Bender said, “The task of helping the drowning people is in the hands of the drowning people themselves.”
Bon Appetit!
Valentine


