I would like some help on choosing some hardware for a project I’m working on.
I need a motor to product mechanical resistance (i.e I need the motor to always want to spring back to a known position, or better yet have that position dynamically change to a few degrees behind its current position.) At this stage I just want to make a proof of concept model so the cheaper the better.
Would someone be able to help me in what hardware I would need to create this?
Hi, and welcome here.
Sounds like a classic “racing simulator steering wheel” application? That has been done several times with simplefoc.
I’d look for an used hoverboard in your local classified ads. The motors are really strong and most of the controllers have already been hacked to run with simplefoc.
I’m actually trying to create a fitness device that would replace the need for physical weights for a university project.
I haven’t thought about other similar applications like a racing simulator and that would be a great starting place for me to look. I will also look into getting a hoverboard too, would the motor and controller from this be able to be connected directly to a microcontroller like an arduino?
There are a lot of broken Hoverboards out there, but the motors themselves are typically fine. This is a good place to start, particularly as you’ll eventually need some decent torque to represent physical weights.
These hoverboards are bldc motors with 3 hall sensors on them. They’ll need a driver board to power them + an mcu. My recommendation is to avoid older 8bit controllers e.g. Arduino Uno r3 and chose a more modern mcu e.g esp32. If you go the 8bit route, then you’ll be posting messages about your code not fitting on mcu or have difficulties tuning the PID because the control loop is slow.
So you could get an esp32 + simplefoc mini + hoverboard motor. Note, you might outgrow the simplefoc mini, but it can certainly turn the hoverboard motor.
Another approach is to pair B-G431B-ESC1 with your hoverboard motor - it includes mcu and driver on same board. However you’ll need to get your head around stm32 mcu - it is also a small unforgiving board (easy to break / hard to solder).
If you just want to do a proof of concept, then I might replace the hoverboard motor with a small £20 gimbal motor (resistance ~10 ohms). They are so forgiving - it is hard to damage them or the board whilst you play and learn. They are comparatively weak though. This option is losing the hall sensors that comes with hoverboard motor, so adds its own complexity as you probably want closed loop (you’ll need to select and attach a sensor)
Hey! I built what you’re trying to do. In it’s current state, SimpleFOC code cannot actively regenerate power back from the motor to an energy sink, like a resistor or battery. You’ll find that to be limiting for your use case. I recommend using something like an odrive controller for your project.
That’s what I did with a hoverboard motor and it’s original controller. It was a rowing machine. It worked quite well on my test-bench.
Now I need to build a welding-room for all the frames I’m planning to put together.
I should be more clear. I’m not sure that, in it’s current form, SimpleFOC can do active regeneration when v_bemf < v_batt. This means that if you apply as opposing torque, and eventually you cause the shaft to rotate in the opposite direction, they’ll be a region where regeneration occurs through the body diodes of the fets and motor windings, getting dumped as heat into the windings instead of boosted to v_batt and captured.
I might be off base here, but after reading about password vs active regen I came to that understanding.
Here is an example in Torque mode.
At 0A target, my power supply shows 0.188A
With 0.5A target, if I spin the motor by hand in the other directly, The minimum I see is 0.169A, so energy must be going back to my controller, but not back to my PSU fortunately.
When not recording, with my 2 hands, I could go lower than 0.120A.
Would be cool if I could use this motor as a brake for another motor.
[EDIT] Spinning it with a hoverboard, almost blowing my PSU for science lol
I think you are confusing original poster. He doesn’t need regenerative breaking, he simply needs to apply a torque to resist user motion. I agree that motor needs to do work and could heat up, but those hoverboard motors can take 100W i expect.
I guess it would be cool if device could do regenerative breaking, but it’s certainly not required.
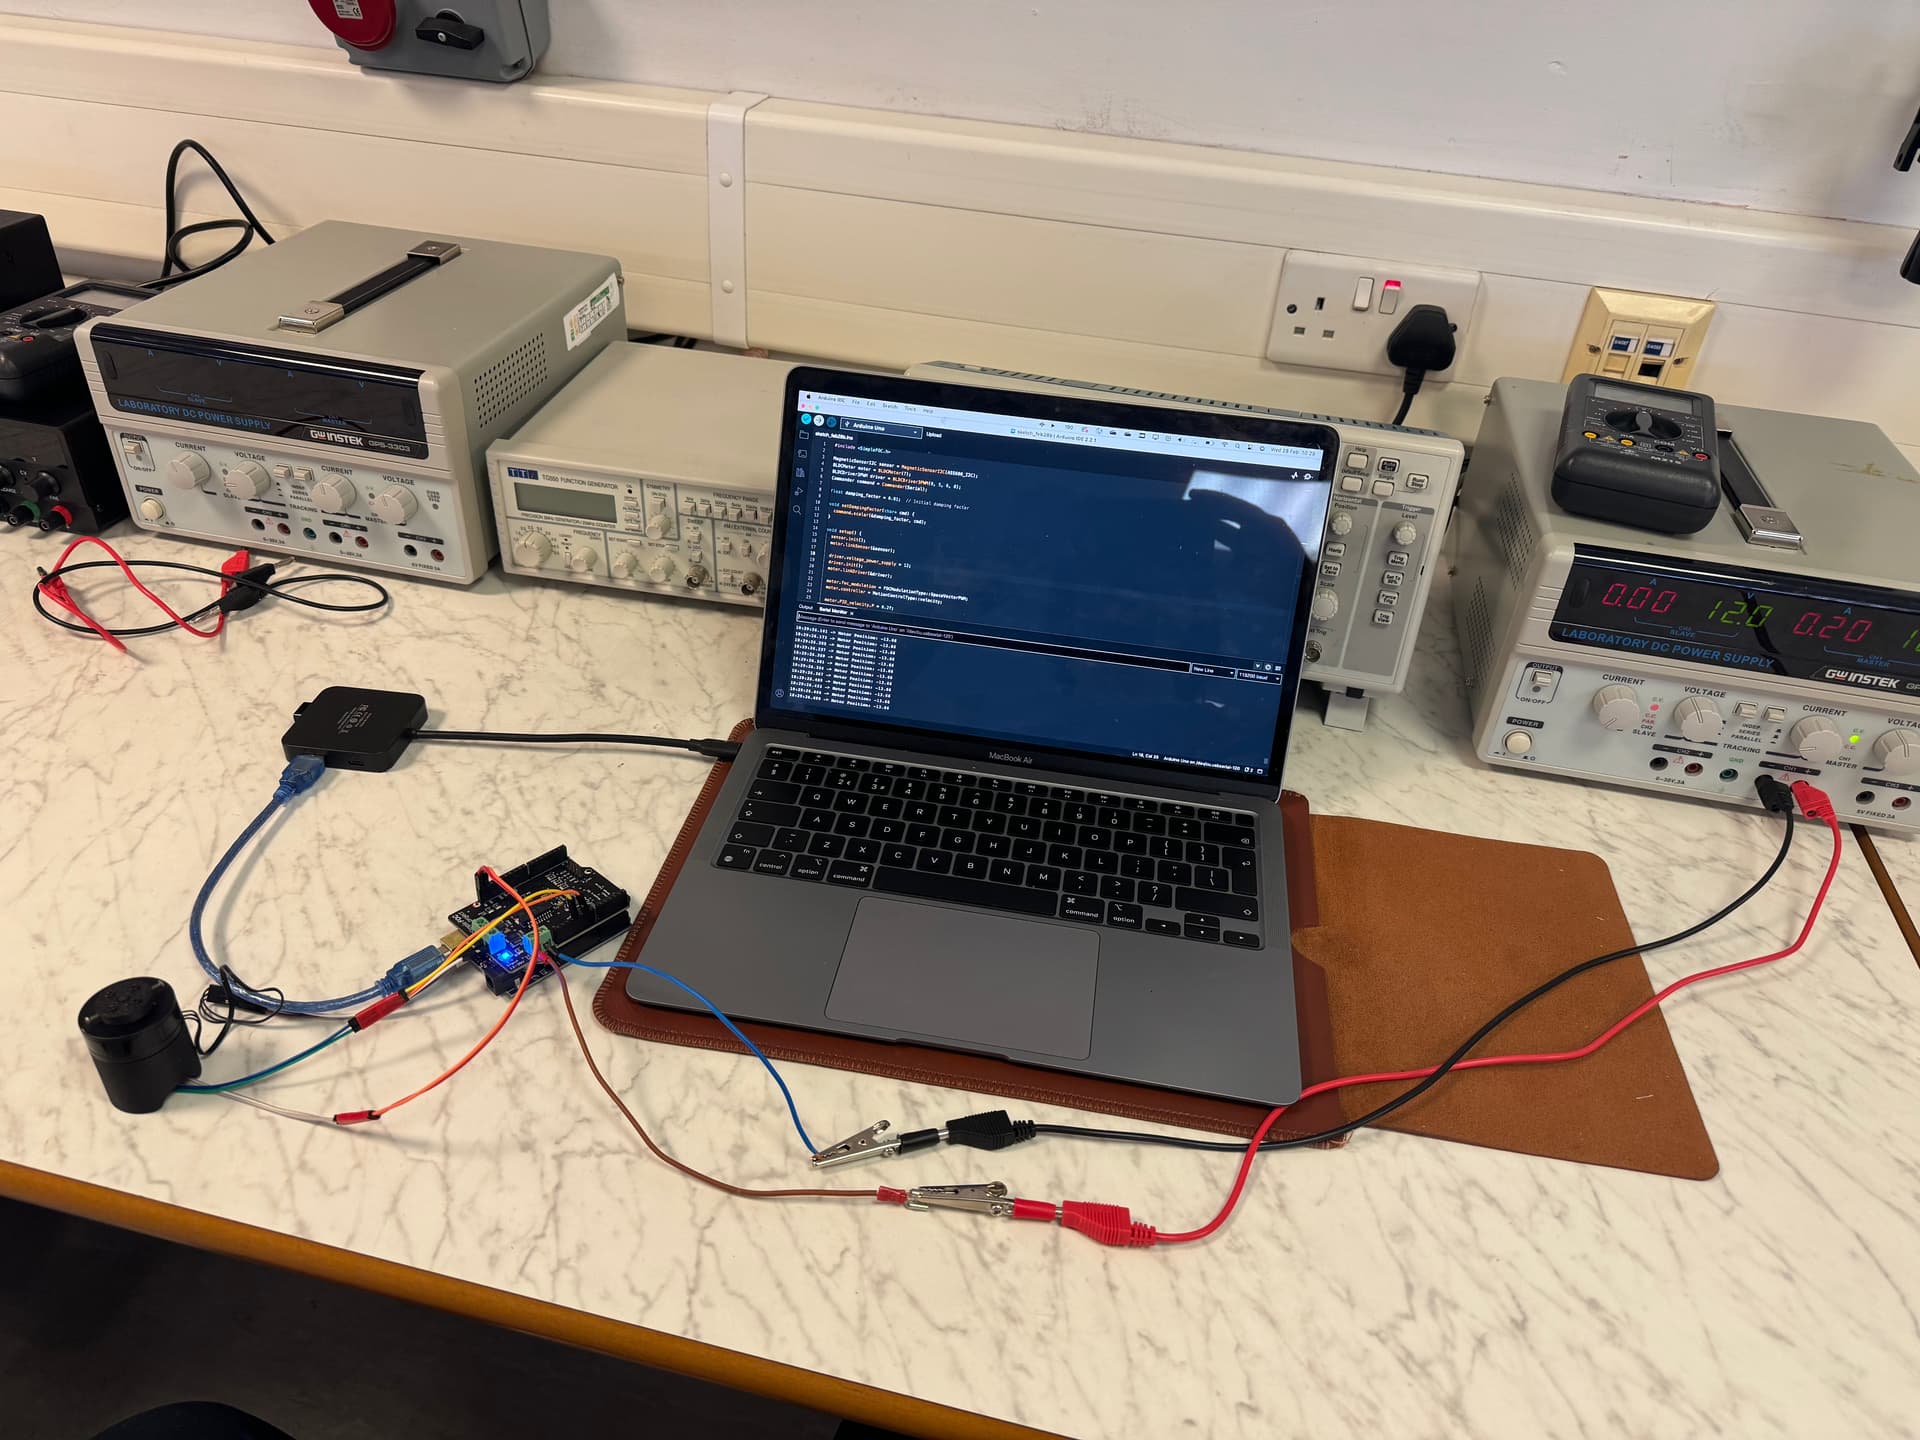
I’m currently using an Arduino uno and the SimpleFOC shield with a cheap gimbal motor I found on aliexpress, I have 3d printed a housing for a AS5600 and a magnet for the encoder.
#include <SimpleFOC.h>

MagneticSensorI2C sensor = MagneticSensorI2C(AS5600_I2C);
BLDCMotor motor = BLDCMotor(7);
BLDCDriver3PWM driver = BLDCDriver3PWM(9, 5, 6, 8);
Commander command = Commander(Serial);

float damping_factor = 0.01;  // Initial damping factor

void setDampingFactor(char* cmd) {
  command.scalar(&damping_factor, cmd);
}

void setup() {
  sensor.init();
  motor.linkSensor(&sensor);

  driver.voltage_power_supply = 12;
  driver.init();
  motor.linkDriver(&driver);

  motor.foc_modulation = FOCModulationType::SpaceVectorPWM;
  motor.controller = MotionControlType::velocity;

  motor.PID_velocity.P = 0.2f;
  motor.PID_velocity.I = 2;
  motor.PID_velocity.D = 0;
  motor.voltage_limit = 12;
  motor.LPF_velocity.Tf = 0.01f;

  Serial.begin(115200);
  motor.useMonitoring(Serial);

  motor.init();
  motor.initFOC();

  // Add a command to set damping factor
  command.add('D', setDampingFactor, "damping factor");

  Serial.println(F("Motor ready."));
  _delay(1000);
}

void loop() {
  motor.loopFOC();

  // Introduce damping effect based on current velocity
  motor.move(-motor.shaft_velocity * damping_factor);

  // Print motor position once every 1 second
  static unsigned long lastPrintTime = 0;
  unsigned long currentTime = millis();
  if (currentTime - lastPrintTime >= 1000) {
    Serial.print(F("Motor Position: "));
    Serial.println(motor.shaft_angle);
    lastPrintTime = currentTime;
  }

  // Handle user commands
  command.run();
}
This is the code I have been using. I can get the motor to give me a constant physical resistance torque when I try and turn the motor by hand. I should be able to change the torque constant with the serial monitor but I haven’t got that working yet.
I am waiting on a ESP32 and SimpleFOC mini to see how different hardware affects things.
My question now is: Can i just swap out the cheap motor for a bigger motor? and can the rest of the hardware be kept the same?
#include <SimpleFOC.h>

MagneticSensorI2C sensor = MagneticSensorI2C(AS5600_I2C);
TwoWire I2Cone = TwoWire(0);

// Motor Parameters
BLDCMotor motor = BLDCMotor(7);
BLDCDriver3PWM driver = BLDCDriver3PWM(32, 33, 25, 22);

// Command Settings
float target_velocity = 0.0;

// Potentiometer pin
const int potPin = 13;

Commander command = Commander(Serial);
void doTarget(char* cmd) { command.scalar(&target_velocity, cmd); }


void setup() {
  // Initialize serial communication
  I2Cone.begin(19, 18, 400000);
  Serial.begin(115200);

  // Initialize sensor
  sensor.init(&I2Cone);
  motor.linkSensor(&sensor);

  // Motor and driver setup
  driver.voltage_power_supply = 12;
  driver.voltage_limit = 12;
  driver.init();

  // Link motor and driver
  motor.linkDriver(&driver);

  // Configure motor limits
  motor.velocity_limit = 20;
  motor.voltage_sensor_align = 1;

  motor.PID_velocity.P = 0.5;
  motor.PID_velocity.I = 6.0;
  motor.PID_velocity.D = 0.0;
  motor.LPF_velocity.Tf = 0.01;

  motor.controller = MotionControlType::velocity;

  motor.useMonitoring(Serial);

  // Initialize motor
  motor.init();
  motor.initFOC();

  // Add commander commands for target velocity
  command.add('T', doTarget, "target velocity");

  // Announce readiness
  Serial.println("Motor ready! Set target velocity [rad/s]");
  Serial.println("Sensor ready");
}

void loop() {

  // Read the analog value from the potentiometer
  int potValue = analogRead(potPin);

  // Map the pot value from 0-4095 to 0-12
  float voltageLimit = map(potValue, 0, 4095, 0, 12);

  // Update the motor's voltage limit
  motor.voltage_limit = voltageLimit;

  // Update the sensor
  sensor.update();

  // Move the motor at target velocity
  motor.loopFOC();
  motor.move(0);

  // Print values every .5 seconds
  static unsigned long lastPrintTime = 0;
  if (millis() - lastPrintTime >= 500) {
      // Print out potentiometer value and mapped voltage limit
      Serial.print("Potentiometer Value: ");
      Serial.println(potValue);
      Serial.print("Mapped Voltage Limit: ");
      Serial.println(voltageLimit);
    lastPrintTime = millis();
  }

  // Continue monitoring the motor
  motor.monitor();
}
I have got the maker base ESP32 board and am using magnetic encoder with a small gimbal motor.
Im using the velocity control with the velocity set to 0. this gives me my desired application for the motor. The controller resists the external motion i apply to the motor.
I’m now trying to add some variability to the resistance that the controller makes.
I have added a potentiometer and mapped the motor.voltage_limit values to 0 - 12 volts but it seems that in velocity control i cannot change the voltage limit.
I’m guessing that the motor.loopFOC(); overrides this? not sure?
does anyone know of a solution i could try?
thanks for everyones input, massively appreciated!
I think voltage limit is being applied, it’s just not having the effect you want.
If we think about what you have. A velocity PID controller.
The velocity pid will be evaluated and give an output voltage. You changing the voltage limit will only have an effect if the pid output is larger which it may not be.
You could try increasing P and I a little but it might become unstable before you get the torque you want.
I suspect you might have to start thinking about a different control mode. E.g position control where you continuously set the position to where it was 0.5s ago.
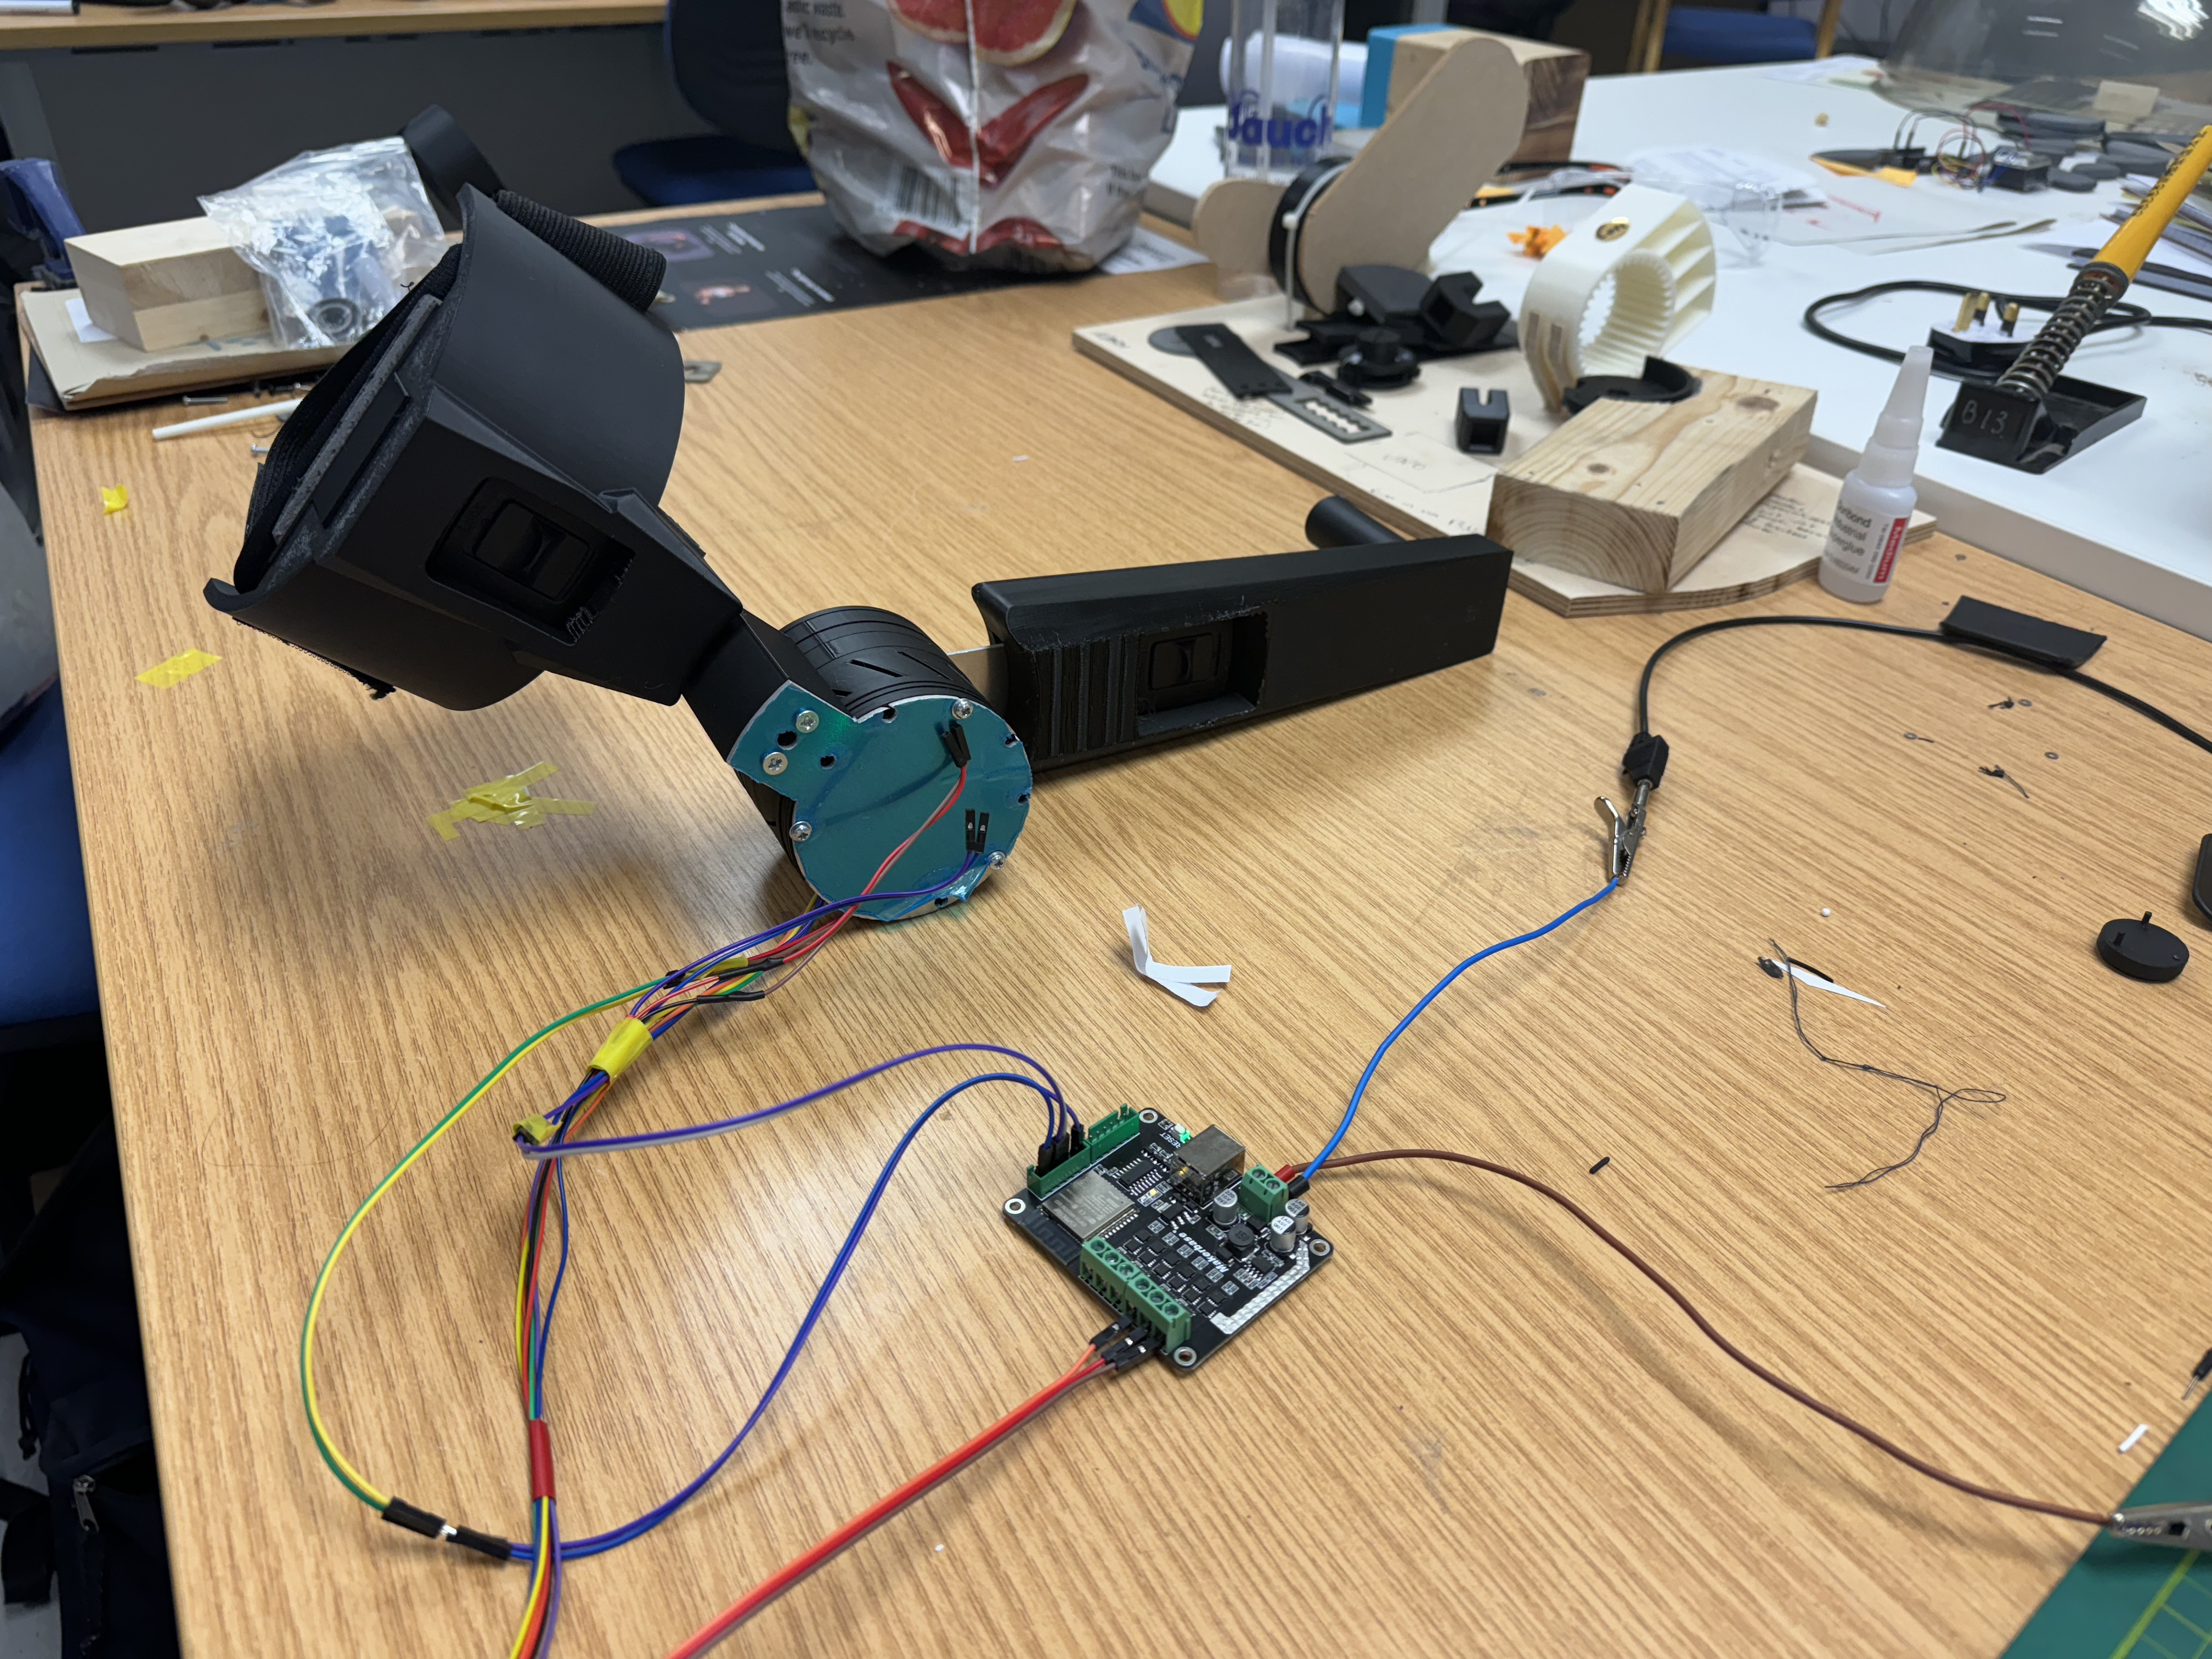
This is the project so far, code works but I haven’t been able to figure out how to write the code for the eccentric movement, pretty cool project and use of simpleFOC library.